zondag 28 februari 2021

Huge Banana Muesli Buns

I often mess around and forget to write down the recipe.  This week I made fiber-rich buns for my sons, which were very much appreciated by my oldest.  So today I baked them again, but couldn't resist adding banana, raisins and dried fruit.  And so it became Banana Muesli buns.  The recipe for the fiber-rich breadrolls will therefore have to wait a while.  😉

Ingredients:
400 ml of lukewarm water
1 tablespoon of cane sugar
14 grams of dried yeast
45 grams of melted (cream) butter
200 grams of Twello's Brown Bread Mix from LePoole
300 gram Oat bread mix from LePoole
2 ripe bananas
20 grams of psyllium fiber Peaks
6 grams of inulin powder
20 grams of broken linseed
30 grams of rolled oats
75 grams raisins
50 grams of cut dried fruit
6 grams of bread salt
1 teaspoon of tartaric baking acid
1 teaspoon of balsamic vinegar
2 tablespoons of powdered milk
1 tablespoon of cinnamon
1 tablespoon of honey
sesame seeds for decoration

Preparation:
1. Preheat your oven to 50 degrees (I always let the bread rise in the oven).
2. Dissolve the cane sugar in the lukewarm water.  Add the yeast and let stand for 10 minutes for the yeast to activate.
3. Add the melted butter and banana, followed by the sifted bread mix, and the other ingredients.  Make sure that the yeast does not come into direct contact with the bread salt.
4. Mix everything together for a few minutes on the lowest setting.  (I have a K-Mix, and do not use the bread hook for this, but the K-mix hook. I think they mix better).  Then turn it to the highest setting and let it mix well for another minute or two.
4. Put the dough on your counter or on a sheet of baking paper and knead well.  Note, it can stick a bit, then put a little bread mix on your hands.
5. Divide the bread into 10 pieces of about 140 grams (I took out 10 large buns, my boys are growing and big eaters).
6. Make round balls and roll them through the sesame seeds, so that they are well covered all over.  If you do show cracks or if it is very sticky, wet your hands and form balls with them.  This way you add some extra moisture to your bread and that benefits your bread rolls.
6. Place the rolls on a lined baking tray and place in the preheated oven.  Let them rise for about an hour.
7. When they have risen enough, increase the temperature of the oven to about 230 degrees.  Because the buns often collapse when I take them out of the warm oven to heat them up further before baking, I just leave them in the oven.  In this way they rise a little further and remain more stable.
Place a bowl of warm water in the oven to create steam in the oven.
8. Once the oven is up to temperature, bake the buns for another 35 -45 minutes.
9. Remove the buns from the oven and let them cool down for a while before eating them.
10. They are delicious with cheese or just some butter.


zaterdag 26 december 2020

Oatflour bagels

Who doesn't love a bagel? My boys do! I made them these based on another recipe I found online (https://www.snixykitchen.com/gluten-free-bagels/) and changed it a bit because of the flours I had in my pantry and the workings of my temperamental oven. 
If you live in the US I suggest you use the original recipe because it uses flours available over the pond. I used Dutch flours from LePoole.
Ingredients
  • 350 ml warm water 
  • 14 grams of yeast 
  • 1 tablespoon of cane sugar
  • 160 grams of LePoole Twello's bruin breadmix 
  • 300 grams of oatflour breadmix by LePoole
  • 20g psyllium husks
  • 6 grams of bread salt (iodized salt)
  • 1,5 teaspoon of cream of tartar
  • 1 tablespoon white vinegar
  • ½ tablespoon extra virgin olive oil
  • For egg wash: 1 egg white beaten with 1 tablespoon water
  • Optional toppings: sesame seeds, poppy seeds, pumpkin seeds or oatmeal.

Poaching water

  • 2 litres of water
  • 2 tablespoons honey
Instructions
  1. Put lukewarm water in the mixer bowl and mix in the sugar. Slowly sprinkle the yeast in the warm water. Let sit for 10 minutes while the yeast activates and foams. 
  2. After 10 minutes combine with the flours, psyllium husk, salt, and cream of tartar followed by the olive oil and vinegar and mix on low to combine. Increase speed to medium and knead for 4-5 minutes until the dough is smooth.
  3. Divide the dough into 8 equal pieces. Knead and roll each piece into a ball and use your thumb and index finger to pinch a whole in the center. Place on a parchment-lined baking tray and repeat with remaining dough, placing them apart. If the dough feels too firm or starts to dry/crack as you roll, either knead in a tiny bit more water or dampen your hands as you knead and roll out a new bagel. When finished with all 8 bagels, put the oventray in a preheated oven that is heated to 35 degrees celcius.
  4. When they're done rising, in my case for about 45 minutes, bring a large pot of 2 litres of water plus honey to boil and preheat the oven to 225 degrees celcius. Whisk together the egg and water and set aside with a pastry brush and have your desired toppings in a separate bowl.
  5. Working in batches of 2-3 bagels, use a slotted spoon or spatula to drop a bagel into the boiling water. Boil for 1 minute, flip each bagel and boil for another minute. Transfer bagels back to the parchment-lined baking sheet, tapping lightly on the edge of the pot to get rid of extra water. Repeat until you've boiled all the bagels.
  6. Brush each bagel with egg wash all over the exposed surfaces and sprinkle with your desired toppings. Bake on the middle rack for about 25-30 minutes until the bagels are golden brown and firm to the touch. Let cool completely before slicing and serving.
  7. Store bagels in an airtight container for two days. Slice and freeze any bagels you won't eat within 2 days. 

zondag 15 april 2018

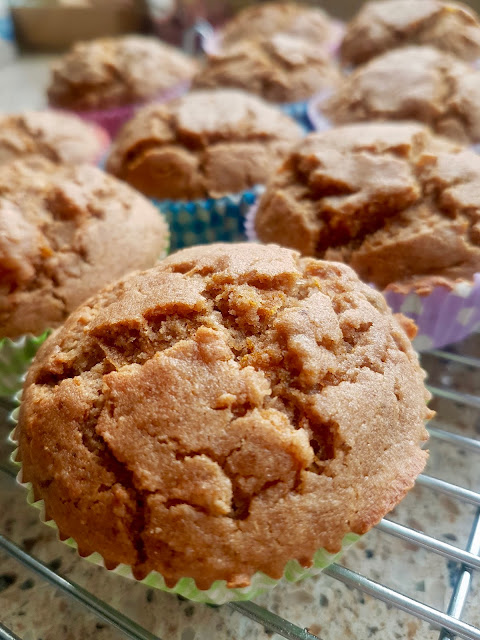
Pumpkin muffins with ginger and mixed spice

Yesterday we had pumpkin risotto  for dinner and (as with every recipe) I was left with about a quarter of a pumpkin, which I did not need in the recipe. I always use more vegetables than the original recipe, because how else do you eat the required amount of vegetables per day? I think: "How can one family live off of 1 onion and 250 grams of pumpkin?", when I read such a recipe. 

I cram my kids full with 'that healthy stuff' called vegetables. In the beginning it was a huge struggle, but now it's getting better. My boys are no longer bouncing with disgust at the sight of asparagus, spinach, beans or pumpkin in this case. Sure, the three P's: fries (in Dutch it's called patat hence the three P's), pizza and pancakes for those who do not know those holy P's) are still favorites, but vegetables are now pretty ok. Not all of them of course, I mean, who likes Brussels sprouts? Blergh! ;-)

But anyway, there I was left with another 200 grams of grated pumpkin. What are you going to do with that? Well ... i decided to make high-fiber muffins, which the boys can take to school in their snack box (or i can take it to work as a snack). 

The recipe below is a free interpretation (read, I used what I had in at home) on a recipe from the Dutch cookery book Powersnacks, and of course I made it gluten free for the boys. In the original recipe, the pumpkin must be cooked, but because it was grated so finely, I have used the pumpkin ijlst like that. That way those fibers are retained a bit better and my gluten free boys need those extra fibers.


Ingredients for about 12 muffins:

  • 200 grams (7 oz) of peeled, grated pumpkin
  • Fresh ginger, piece of 4 cm finely grated
  • 3 eggs
  • 4 tablespoons  of date syrup (every syrup works I think)
  • 100 grams (3.5 oz) of Greek yogurt (the recipe contained 225 grams (8 oz) of yogurt, but I did not have that anymore, so I added crème fraiche and milk to it.) Also works. ;-))
  • 125 grams (4.4 oz) of crème fraiche
  • 50 ml (1.7 fl oz) of milk
  • 175 grams (6.2 oz) of rice flour
  • 100 grams (3.5 oz) of cornmeal
  • 3 teaspoons of cream of tartar baking powder
  • 2 tablespoons of gingerbread spices/ mixed spices


Instruction:

  1. Preheat the oven to 190 degrees centigrade/ 360 fahrenheit. 
  2. Grease the muffin tin (or multiple muffin tins) or place paper cups in the cavities.
  3. Mix the pumpkin, ginger, rice flour, corn meal, tartar baking powder and gingerbread spices in a large mixing bowl.
  4. Beat the eggs with the crème fraiche, yogurt, milk and date syrup and pour this into the flour and pumpkin mixture. Stir everything together until everything is mixed well.
  5. Spoon it into the cavities of the muffin tins and decorate the batter with some pumpkin seeds if you have them (i didn't) and put in the oven. Bake this for about 20 minutes until the muffins have risen and are nicely brown.
  6. Allow them to cool for five minutes in the tin before removing them from the tin and allowing to cool completely on a rack.
Enjoy your meal!

dinsdag 9 januari 2018

Glutenfree oatcakes

I'm reading Jenny Colgan's The Summer Seaside Kitchen and in them the main character Flora makes Scottish oatcakes. Usually her books contain a few recipes and this one is no exception.... except... the Scottish Oatcakes aren't one of them. So I searched the ever knowing world wide wide and made my own version of the various different recipes I've found. 


These oatcakes are wonderful with a bit of butter or cheese, but I think they make a great and quite healthy breakfast option too, as I'm one of those breakfast cracker kind of person. ;-)

I made these crackers with 100% gluten free oats and oat flour so my two gluten free sons can eat them as well. My sons don't react to oats (i know that is not the case for everyone with coeliacs disease) and they love eating oatmeal and such. 


Ingredients: 
  • 100 grams of rolled oats
  • 175 grams of oat flour
  • 1 teaspoon of cream of tartar
  • 60 grams of cold butter
  • 1 teaspoon of iodised salt
  • 1 teaspoon of sugar
  • 100 ml  of hot water
Instructions: 
  1. Pre-heat the oven to 200 degrees centigrade or 390 degrees Fahrenheit.
  2. Mix together the rolled oats, oat flour, cream of tartar, iodised salt and sugar in a big bowl.
  3. Add the cold butter mix this through the flour and rolled oats mixture by rubbing it together until everything is mixed. It should have the consistency of bread crumbs. 
  4. Add the water (just bit by bit) and combine until you have a somewhat thick and slightly sticky dough. The amount of water varies; depending on the oats. I needed a lot of water. 
  5. Sprinkle some flour on a clean work surface and roll out the dough to  thickness that's about 1/2cm. Use a cookie cutter to cut out shapes. 
  6. Place the oat cakes on a baking tray and bake  them in the oven for  about 20-30mins until a light golden brown colour. 
  7. Let them cool a bit on a wire rack before you eat them with some salted butter or cheese. 

zondag 17 september 2017

Yoghurt cheesecake with blueberries and a country cookie base

This recipe popped up in my mind  the moment I saw the biscuits cakes they were baking in last weeks Heel Holland Bakt- episode (this is the Dutch version of the Great British Bake Off). But... just before the new broadcast tonight, it is finished: a gluten-free yoghurt cheesecake with blueberries and a country cookie base.

My kids (and I am too) are crazy about country cookies based on (gluten-free cultivated and processed) oatmeal. It seemed to me an ideal crust for a zingy cheesecake. And blueberries and cheesecake .. they just belong together? Right? So that cheesecake had to be made before it drove me crazy.


Ingredients:

For the bottom and some cookies for decoration

  • 300 grams of oatmeal (gluten-free cultivated and processed)
  • 3 teaspoons of ground cinnamon
  • a pinch of salt
  • 100 grams of ground coconut
  • 4 small eggs
  • 10 tablespoons honey
  • 125 grams of butter (melted)
  • 1 teaspoon vanilla extract

For the cheesecake filling

  • 500 grams of Greek yogurt
  • 300 grams of cream cheese (at room temperature)
  • 4 small eggs or 3 large ones
  • 150 grams of fine caster sugar
  • 50 grams of rice flour (gluten-free)
  • 1 teaspoon of vanilla extract
  • 1 teaspoon of  lemon zest

For the blueberry topping

  • 100 ml of pear juice
  • 150 grams of blueberries
  • 3 leaves of gelatin

NB. Make sure you have some extra blueberries to put on the bottom of the cheesecake

Preparation:

  1. Preheat the oven to 160 degrees Celcius (325 Fahrenheit).
  2. Cover a spring tin of 20 cm diameter with baking paper and grease it.
  3. First make the dough for the bottom and the biscuits. Put all of the ingredients in a bowl and mix with a mixer until you have a cohesive mixture (it will not be a firm dough, but all oatmeal and coconut must be sticky with the other ingredients). Fill the tin with 2/3 of the dough and make sure you coat the edges.
  4. From the remaining dough, make small biscuits, that you bake on a baking tray covered with baking parchment for 10-12 minutes at 200 degrees Celcius.  This can be done while your cheesecake is in the oven (or if you only have 1 oven: after baking the cheesecake, as this must cool down for 3 hours in the fridge).
  5. Now make the cheesecake mixture. I put everything in the bowl of my kitchen machine and that beat it until well combined. To prevent lumps (that's what happens with the Monchou cream cheese if you have just taken it out of the fridge like I did) I used my blender to whip it into an airy mixture (and the lumps will also have disappeared ;-) ).
  6. Sprinkle blueberries over the dough and pour the cheesecake mixture over it.
  7. Put the cheesecake in the oven and cook it for about 60-80 minutes. The top is then light brown and the middle can no longer wobble. If the cheesecake is slightly cracked in the middle and it doesn't wobble it is usually cooked. First let it cool down and then refrigerate the cake to completely cool in 3 hours.
  8. When the cheesecake is in the oven, make the blueberry jelly. Cook the pear juice with the blueberries  and let it boil for 5 minutes or so. Take it off the heat. Soak the leaves of gelatin in cold water and add to the warm blueberry mixture, puree it with a blender to get a smooth jelly. Allow to cool and pour over the cheesecake when it is cooling down in the oven (in my case the jelly was too set already so it is slightly less smooth than I intended).
  9. Decorate with some cookies and serve your guests (or eat it yourself ;-))

Bon Appetit !!

zondag 9 oktober 2016

Carrot cake with walnuts, raisins and coconut


Now that autumn has arrived I wanted to bake a nice robust cake, a pie in which you can taste the fall. My first instinct was to make pumpkin pie, but my boys were not quite in favor. They think pumpkin is delicious in a risotto, but as a pie ... that's a step too far. So carrot cake it was. Not typically autumn, but mixed spices give it a hint of autumn. And it contains lots of fiber, something thatmy boys with their gluten-free diet can really use. When the batter was finished I had so much that I ended up baking two cakes. One for us at home, and one that I take to work, where they already know that gluten free tastes good. ;-)

I have a basic recipe adapted added lots of extras. 
The end result:


Ingredients:
For the carrot cake

  • 300 grams (10.5 oz) of grated carrot
  • 180 grams (6.35 oz) of walnuts
  • 50 grams (1.75 oz) of coconut
  • 100 grams (3.5 oz) of raisins
  • 2 tbsp mixed spice
  • 50 grams (1.75 oz) of almond flour
  • 200 grams (7 oz) of rice flour
  • 2 bags of baking soda (or two teaspoons)
  • 300 grams (10.5 oz) brown sugar
  • 100 grams (3.5 oz) of butter
  • 200 ml (7 fl oz) of coconut oil
  • 4 eggs (separated)

For the cream cheese buttercream:

  • 400 grams (14 oz) of cream cheese
  • 250 grams (8.8 oz) of butter
  • 250 grams (8.8 oz) of icing sugar
  • 1 teaspoon of vanilla flavoring

Preparation:

  1. Preheat the oven to 150 degrees Celsius/300 degrees Fahrenheit.
  2. Melt the butter and coconut oil (if solidified) and whisk in a bowl with the caster sugar until creamy.
  3. Mix the carrot, walnuts, coconut, raisins, spice cake, almond flour, rice flour and baking soda in a separate bowl.
  4. Beat the egg yolks with the butter and sugar mixture and add the dry ingredients to this. Beat the egg whites in a clean, dry bowl and fold gently into the batter. Do this carefully so that you keep the air inside.
  5. Grease a large springform pan (I used two little ones) and line it with parchment paper. Spoon the batter into the springform pan(s) and smooth. Put it in the oven and bake 45 minutes at 150 degrees/300 degrees fahrenheit.
  6. After three minutes, turn the temperature to 170 degrees celsius/ 340 degrees fahrenheit and bake the cakes even further (about 30 minutes). Make sure the top is not too dark, otherwise you cover it with aluminum foil.
  7. Meanwhile, make the butter cream by putting all the ingredients into the food processor and mix for some time (I let my machine mix for 45 minutes on a low setting). Thus, it becomes a light cream.
  8. If the cake(s) are ready, remove them from the oven and let them cool completely on a rack. When they are cool you cut them and fill them with some of the cream and the rest you spread over the top. Decorate the cake with whole walnuts (or as I did with marzipan and chocolate figurines).

Bon appetit!

zondag 4 september 2016

Blueberry muffins

I'm almost ashamed to say it's been a really, really, really long while since I've actually blogged a recipe. That doesn't mean I've stopped baking, because baking never stops when you have two gluten free boys to take care of. But life has been a tad bit hectic so blogging the recipes I developed never quite 'happened' to make it onto here. 

This week a brand new kitchen gadget arrived: My very own Kenwood Kmix and that was reason enough to bake something. Because, it is no use letting it be pretty on your kitchen countertop right? So... blueberry muffins it was. And they turned out so nice I just couldn't let them go "unblogged'. So hey... I'm back! 


This recipe makes 12 midsize muffins

Ingredients: 
  • 100 grams (3.5 oz) of rice flour
  • 50 grams (1.76 oz) of corn flour
  • 100 grams (3.5 oz) of almond flour
  • 75 grams (2.65 oz) of sugar
  • 10 grams (0.35 oz) of vanilla sugar
  • 2 teaspoons baking soda
  • 2 teaspoons fiber husk
  • 1 teaspoon of xanthan gum
  • 1 teaspoon of cinnamon
  • 100 grams (3.5 oz) of soft butter
  • 2 dl (3.33 fl oz) of butter milk 
  • 2 eggs
  • 175 grams (6.17 oz) of blueberries


Instructions:
  1. Preheat the oven to 175 degrees centigrade/ 350 fahrenheit. 
  2. Put the paper cups into the muffin tray or butter the muffin tray. 
  3. Mix all the dry ingredients in one bowl. 
  4. Beat the sugar into the soft butter until it is a fluffy mixture. Add the eggs and beat them into the butter mixture. 
  5. Add the mixed dry ingredients and mix it all in until it is combined. Then add the blueberries and fold them in carefully so they won't break open. I added them to the mixture in my Kmix and let it mix on the slowest/first setting. 
  6. Scoop the mixture into the muffin tray with a spoon. 
  7. Put in the oven and bake for about 20-25 minutes until golden brown. 
  8. Take them out of the oven, let them cool in the tray first for a couple of minutes. Then take them out and let them cool completely on a wire rack. 
Enjoy!!