zaterdag 23 februari 2013

Basic glutenfree cookie recipe that never fails

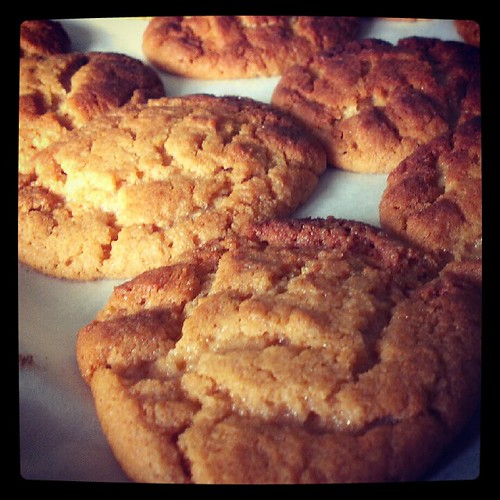
I hardly every buy glutenfree cookies for my kids, even though there are wonderful products out there. I almost always bake them myself, with some "help" from my boys. Not only because my kiddo's love baking them with me, but because this way I know exactly what I serve my kids. No preservatives, no scary sounding ingredients that I have to google. And with this recipe it's hardly a hardship. The only obstacle during the cookie making process is my 2,5 year old son, who just eats the cookie dough before I can turn it into cookies. This basic cookie dough never fails and you can experiment with it as much as you like. This recipe doesn't make crunchy cookies but soft, gingerbreadlike, delicious ones. The recipe uses orange zest to flavour the cookies, but my kids make me add gingerbread spices always, because the like that best. 

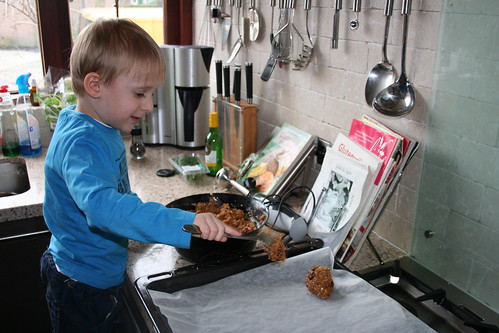
My little rascal enjoying the dough
Ingredients:
200 grams (1.6 cup) of rice flour
0.5 tablespoon of xanthan gum (to keep your cookies from crumbling)
1 teaspoon of glutenfree baking soda
50 grams (a little over 1/3 of a cup) of light caster sugar 
orange zest from one orange ( I add 2 tablespoons of gingerbread spices)
50 (about a 1/4 of a cup) grams of butter
1 egg
2 tablespoons of golden syrup

Instructions:

  • Preheat the oven to 160 degrees centigrade (320 degrees centigrade)
  • Put all dry ingredients in a kitchen aid or bowl and slowly add the other ingredients while mixing. Add some extra rice flour if the mixture is too moist, and a bit of milk if it gets too dry. 
  • Take it out of the bowl, dust the surface and roll out to an even dough, about half a centimeter or half an inch thick. Get out your favorite cookie cutters and cut out about twenty cookies. 
  • Put them on a baking tray lined with baking paper and bake them in the preheated oven for about 10 minutes. 
  • Let them cool on a wire rack. If you want, you can decorate them with icing, but my kids love them just the way they are!
Enjoy! 


donderdag 21 februari 2013

Baked Potato Soup

Here's a lovely recipe for a soup you can easily eat for dinner. It's not mine, it's by Felicity Cloake and I found it in Jamie magazine. And since glutenfree is way more than just baking bread and cookies and using glutenfree pasta, i felt i needed to share it here. The potatoes work their magic in binding the soup, so there is no need for any flour or maize starch (which of course is glutenfree) to come near this soup. 


Ingredients:
3-4 big potatoes (or left over baked ones)
40 grams (1.5 oz) of butter
1 onion, roughly sliced
1 parmesan crust, doesn't matter how big and it is optional
1.5 liter (50.72 floz) of chicken stock (home made is best, but there are great glutenfree ones out there)
some sour cream
chives
Crispy bacon and extra parmesan 

Instructions:
1. Pre-heat the oven to 180 degrees centigrade (356 degrees fahrenheit).
2. Rinse the potatoes, dry them, punture holes in them, wrap them in aluminium foil and put them in the centre of the oven for about 75 minutes. Check regularly buy pinching/poking them. They should give in a bit. 
Take them out of the oven and cut them in quaters. leave to cool. 
3. Melt the butter and fry the onions till soft in 10 minutes
4.Cut the potatoes in small dices
5. Toss the potato dices and the parmesan crust in with the onions. Add a bit of salt and pepper and cook for about 5 minutes.  Now add most of the chickenstock (about 1.25 liters - 42,28 floz), bring to boil and let it simmer for about 30 minutes. 
6. Remove the parmesan crust and blitz the soup into a smooth mixture with a blender. Put back into the pan, taste and add salt and pepper if necessary. Put in the rest of the chicken soup if it has gotten to thick.  
7. Put a dollope of sour cream in the soup, add some chives and black pepper and some crispy bacon and parmesan to decorate. 
Lovely with the cheezy breadsticks you'll find on this blog as well. 

Zingy Piratey glutenfree orange cupcakes

I'm one of those suckers that always buys cupcake decoration magazines because I just love creating something new everytime & I love leafing through them. One of them, Cupcake Heaven, published a glutenfree recipe and I just had to try it. And so I did today and it's just marvellous! So all credit goes to Cupcake Heaven, but I thought I'd share this here too. 

My oldest pirate and his creations! :)


Ingredients:
110 grams (half a cup) of soft unsalted butter
110 grams (almost a cup) of sugar
110 grams (almost a cup) of almond flour
55 grams (half a cup) of mais flour or polenta flour
1/2 teaspoon of glutenfree baking soda
1 teaspoon of vanilla aroma (but better yet, use vanilla pods, one will do!)
1 egg
1 egg yolk
a pinch of salt
1 orange, squeezed & grated (for the orange zest)
4 tablespoons of powdered sugar
Marzipan to decorate

Instructions:


  • Preheat the oven to 200 degrees centigrade (392 degrees Fahrenheit)
  • Put 12 cupcake cups in the cupcake tin
  • Put all the ingredients (except for the orange juice, zest, marzipan and powedered sugar) into the bowl and beat with a mixer to a smooth dough.
  • Add the zest and one tablespoon of the orange juice)
  • Beat again. 
  • Put the mixture into the cups and put the tins into the oven. Bake for about 12-15 minutes until they are golden brown and firm.
  • Leave on a rack to cool. 
  • Mix the powedered sugar with another tablespoon of juice. 
  • Roll out the marzipan & cut shapes with cookie cutters by choice. Use the orange juice glaze to glue the marzipan to the cakes. 
  • Enjoy!
 

And since my little boys are pirates at heart, we put Pirate decorations on the cupcakes, hence the Pirate reference in the tiltle of this recipe blog. :-D
ARGH! ARGH!

Cheezy breadsticks

I love soup. Soup is wholesome, soup is healthy, soup is comforting and it's often so easy to make and easily to make glutenfree too! 
And no bowl of soup is complete without bread. I make these breadsticks for my kids, but I'm not ashamed to say that I actually love them very much myself. 


I must admit they don't look pretty, but who cares about that when they taste wonderful? 

The recipe is dead simple, but i have to admit my breadsticks turned out a bit chewy when i baked them the first time, not crisp. Why? Because I read the recipe wrong, but I actually liked it much better, so I always use my own "wrong" version of the recipe, posted below. I hope you'll like it too!

Ingredients:
250 grams (almost 2 cups) of glutenfree flour
7 grams (0.75 oz) of yeast
25 grams (0.88 oz) of flaked butter
2 eggs
pinch of salt

Instructions:

  • Preheat oven to 35 degrees centigrade (95 fahrenheit) to let the dough proof later. 
  • Put all the ingredients (only one of the two eggs though) into the bowl and kneed with a kitchen aid or mixer to a firm dough. Add some more flour if the dough gets really sticky. (Here's where I went wrong, in the original recipe was only one egg and that was to coat the dough with before you put it in the oven. I, on the other hand threw in the egg and ended up with soft chewy breadsticks)
  • Put it in the oven to proof for about 45 minutes. 
  • Take the dough out of the oven and heat up the oven to 220 degrees centigrade (437 fahrenheit). Make 20 little balls of the dough and roll them out to resemble breadsticks. Remember, they don't have to look perfect, as long as they taste amazing!
  • Coat the dough with some beaten eggyolk and sprinkle cheese on top. I used normal Gouda cheese (hey, i'm Dutch after all!) but I think parmesan would be wonderful too!
  • Bake in the oven for about 25 minutes until goldenbrown. Let them cool on a rack and serve with a wholsome, fantastic soup. 


dinsdag 19 februari 2013

Dead simple peanut butter cookies

A friend of mine send me this recipe and it is too good not to share! It's wonderful whether you are glutenfree or not and it is dead simple. Anybody can make these, even if you are challenged in the baking department.There is only one but... you have to love peanut butter. If you don't? Please check out some of the other recipes i posted here. 

Ingredients:
1 cup (266 grams) of peanut butter 
1 cup (136 grams) of sugar 
1 large egg, beaten 
1 teaspoon baking soda 
1 teaspoon of xanthan gum ( i use this because the cookies tend to break easily as no flour is used that usually adds to a better consistency and this makes them a bit more firm)

Directions: 
1 Preheat oven to 350* and grease cookie sheets. 
2 Beat together peanut butter, the xanthan gum and sugar in a large bowl with an electric mixer until smooth. 
3 Add beaten egg and baking soda to peanut butter mixture and beat until well combined. 
4 Roll 1 teaspoon of dough into a ball and place on cookie sheet. 
5 Place dough balls one inch apart on cookie sheet and flatten with tines of fork making a cross pattern. 
6 Bake until puffed and a golden pale, about 10 minutes. 
7 Cool cookies on baking sheet about 2 minutes and then transfer with spatula to rack to cool. 8 May be kept in air tight container at room temperature for 5 days. 
9 Makes about 2 dozen cookies.

Enjoy! 

Ps. I think if you melted a bit of chocolate and dipped them in it and let them cool you'd have very yummy and luxurious cookie to serve when you have friends over... 

Jordan inspired cupcakes

Here's another (glutenfree) recipe of mine based on a totally embarrassing & totally fun Twitter-convo. For those of you who don't know this, i'm a blockhead. A what? A Blockhead. A New Kids on the Block fan. Yes, they are still around. Yes, i still love them. Yes, I think Jordan Knight is the bees knees and I loved Jonathan Knight back in the day (still do actually). Anyway, that conversation started something like this:


@JKfiedJongirl @jordanknight say... if you were a cupcake what flavour would you be? 
Yes, my twittername is NKOTB inspired too. ;-)
(Yeah, truly i asked him that. I know, i was bored, i have no shame & i need a life! :))
Responses came flying, but of course not from Jordan (if he even saw it he must've hit the mute button as fast as a BH who sees a Vip ticket popping up in her computerscreen). But... thank the lord, i am not the only bored weirdo out there. I figured he'd be a double chocolate cupcake with mascarpone frosting. Yummy yet classy.
Of course the majority of my USA based followers figured he tasted like a chocolate cupcake with Nutella frosting. Seriously, what is it with those Americans and the worship of hazelnut flavoured chocolatespread? Here only kids eat that stuff as far as i know. ;)
Progressively the tweets got, how shall we say..., so embarrassing i'd better not repost all of that here? Anyway, we also figured he could be a chocolate cupcake with a peanutbutter frosting. Yeah... don't judge until you tried it!

It gave me enough inspiration to start another baking session on another boring day. It ended up as these cupcakes:


For the (glutenfree) cupcakes i simply used a glutenfree cakemix and added extra cocoa and chocolate chips for good measure and baked them as the instructions on the packet said. So just use whatever you normally use to make cupcakes or cakes. There are many options out there these days. The magic is in the frosting! :)
I let them cool and made my frostings. Here are the amounts. I decorated 4-5 cupcakes per flavour with these amounts:


Mascarpone frosting:
100 grams of mascarpone (roughly half a cup or a little less?)
100 grams of powdered sugar
a few spoonfulls of milk


Nutella frosting:
50 grams of butter
3-4 spoons of Nutella
100 grams of powdered sugar


Peanutbutter frosting:
40 grams of butter
85 grams of peanut butter
100 grams of powdered sugar
30 ml of milk

I decorated the mascarpone & peanutbutter cupcakes with chocolate sprinkles, the Nutella with smashed hazelnuts & nougatine.
All were yummy, but i still hope he'd tasted like chocolate & mascarpone. :) If you completely disagree and you think Jordan would make a totally different cupcake, please don't hesitate to share it here, i might attempt to make it! (Please enable me, ok? )


Rumpledoodles!

I love baking with my kids and they love spending time in the kitchen with mom. The sooner you teach your kids to bake & cook, the better equipped they will be once they are on their own two feet. Plus, it triggers them to be creative as well. One of the easiest recipes i started on with my kids was this one. It's an amazingly simple but oh so yummy recipe that originates from The Heffalump Movie.

The what? If you don't have kids you most likely have no clue what that is, but a Heffalump is the Pooh version of an Elephant. A rumpledoodle is a Heffalumps favorite cookie and at the end of the movie they supply you with a recipe to make them for your kid.
Since the base of the recipe is oatmeal, which is glutenfree if you buy the non-contaminated kind, it was one of the first recipes i tried out. It is also full of fibers and fairly low on sugars so a healthy option for your kid (or yourself!) :)

Rumpledoodles:
1 cup or 150 grams of rolled oat
1 cup flour or 150 grams of glutenfree flour (i use simple riceflour or another basic glutenfree flour)
1 cup  or 100 grams of grated coconut
1/2 cup or 150 grams of raisins
1 teaspoon cinnamon
1 tablespoon baking soda
1 teaspoon salt
5 tablespoons molasses (maple syrup works really well too!)
1/2 cup unsalted butter (if you are lactose intolerant as well, you can substitute it for soy butter or something similar)
2 tablespoons boiling water

Directions: 

Preheat oven to 350°F (i bake them om 180 centigrade for Europeans)
Grease 2-3 cookie sheets.
Mix oats, flour, coconut, raisins, cinnamon, baking soda and salt in large bowl.
Melt butter in microwave in a small bowl.
Add molasses and boiling water to the butter.
Pour butter mixture into the flour mixture, stir well.
Drop by tablespoons onto cookie sheets. (they originally say teaspoons, but those make really tiny cookies)
Bake 12-15 minutes.

Allow to cool or eat warm with your favorite little Heffalump!

p.s. see my kid at work! All he needs help with is the measuring and putting it in the oven and taking it out. 

T making rumpledoodles


You can add as much nutricious stuff to this recipe as you want. I often put in pieces of dried apple and apricot, dried cranberries or nuts. I think if you spread it on oa baking tray as a whole and baked it and cut it afterwards you can make amazingly wonderful granola bars too! 

zondag 17 februari 2013

Glutenfree dates & fig bread

This wonderful bread is much loved by my two kids as it tastes wonderful directly as it is baked, but also after a few days in the freezer. Toast it, put some honey or preserve on it and you have a wonderful breakfast full of fibers. 

I make this bread in the breadmaker, but you can also make it in a conventional oven. 


Ingredients:

75 grams (2.65oz) of dates
75 grams (2.65 oz) of figs
750 grams (26.455 oz) of glutenfree all purpose flour, i use an 'all bran' version to make it more substantial.
700 ml (23.67 fl oz) of lukewarm water
10 grams (0.35 oz) of fiber husk (to add more fibers to your bread and to improve consistency)
3 tablespoons of olive oil
2 teaspoons of xanthan gum
12 grams (0,42 oz) of sugar
18 grams (0,64 oz) of yeast 
6 grams (0,21 0z) of baker's salt (you can use normal salt too but bakers salt adds iodine to your bread which gives a better taste to your bread)


Made in the breadmaker: 
Put the dates and figs (make sure the kernel has been taken out of the dades first, you don't want to ruin your kitchenmachine/blender) in the kitchenmachine and grind them to tiny pieces. It almost looks like a paste when you are done. 

Add the lukewarm water to bread mold. Put in the fiber husk and the olive oil. 
On top of that you add the glutenfree all purpose flour. Now you add the sugar, xanthan gum, bakers salt or normal salt and the yeast. make sure the yeast does not come in direct contact with the salt, because that will diminish the effect of the yeast. Then add the dades and figs. 

Put the bread mold into the machine. If your machine has a French bread setting, use it! It gives the best result, as it allows the bread to develop and proof very slowly. If you don't, some machines have a glutenfree setting. Just make sure that the bread gets the chance to develop well. Help the machine along with a wooden spoon or fork when it mixes the dough, as it will turn into one heap and will not mix everything sometimes. That's what you get when you have no gluten to help the dough to stick together. Now wait and be prepared to take a wonderful loaf out of the machine when it's done. 

In the conventional oven:
If you use a conventional oven, put it on 35 degrees centigrade or 95 Fahrenheit so your oven is warm enough to let your dough proof. 

Put the dates and figs (make sure the kernel has been taken out of the dades first, you don't want to ruin your kitchenmachine/blender) in the kitchenmachine and grind them to tiny pieces. It almost looks like a paste when you are done. 

Put everything in a big bowl in the same order as you would in the breadmaker. 
Add the lukewarm water to bread mold. Put in the fiber husk and the olive oil. 
On top of that you add the glutenfree all purpose flour. Now you add the sugar, xanthan gum, bakers salt or normal salt and the yeast. make sure the yeast does not come in direct contact with the salt, because that will diminish the effect of the yeast. Then add the dades and figs. 

Mix it on a slow mode for 2-3 minutes first. When it's mixed well, put the mixer on a fast mode a mix some more (usually 6-8 minutes will do). Mind you, this will train your arm muscles, mixing is hard work. 

Grease a bread mold and transfer the dough into it. Even it out. Put the dough in the preheated oven and add a bowl of water, that will help the proofing process of the dough. Put the timer on 50 minutes. 

When your dough has risen to double it's size, take it out of the oven and cover with a damp dishcloth while you preheat the oven to 225 centigrade or 437 Fahrenheit. After ten minutes, put the bread (without the dishcloth) back into oven. Leave the bowl with water in the oven and bake the bread in 45-50 minutes until it smells heavenly and is golden brown. 

When it's done, leave it to cool on a wire rack under a fresh (dry) dishcloth for at least an hour and a half. When fully cooled, enjoy a slice or slice it up and put it in packets in the freezer to enjoy later.  


Why i do the things i do & an easy recipe to start with.


I'm a mom of two wonderful boys named Thijmen & Gijs. They live a glutenfree life. Thijmen was diagnosed as a celiac when he was 11 months old, and ever since that moment i'm more than a momma. I am a glutenfree momma. It was a struggle at first, to find out how to bake a bread that didn't tast like cardboard and to make cookies that didn't crumble when you touched them. 
Shopping took hours to find out what was safe to feed my kid and what i could feed him to make him healthy again and growing. Because my wonderful boy was underfed. Big time. 
His younger brother started losing weight when he was just over 1 years old. He cried of tummy ache and slept hours and hours. It looked so familiar, so we had him tested. There were no antibodies found, but he is a happier little boy ever since he joined his brother on the glutenfree diet. And since he prefers glutenfree foods over normal food, we are keeping him on the same diet to have him tested again when he is a bit older. And so, this glutenfree momma now bakes and cooks for two. 

 
I've started this blog to share the recipes that i use so others won't have to struggle the way this mom did. I'll be adding recipes regularly and when my boys are old enough to stand on their own two feet, i'll probably have a cookbook that i can share right here. 

 
I must add that I love making cupcakes, cakes, cookies and such so you'll find many of those recipes here. I'm Dutch, so many of my recipes will be in grams, but i'll try to adapt to cups and ounces as well. 

 
I'll start with an easy recipe for shortbread that i made with my son this week. Recipes for bread etc will follow soon. 

 
Shortbread:
  • 1 cup/225 grams of unsalted soft butter
  • half a cup / 60 grams of powdered sugar
  • 2 tablspoons of brown sugar
  • 1/4 tablespoon of salt
  • 1.5 cup / 190 grams of glutenfree all purpose flour 
  • 0.5 cup /65 grams of rice flour
  • 1 teaspoon of xanthan gum

 
To decorate:
  • glutenfree M&M's or smarties (check the ingredient declaration, in Holland the ones by Jumbo are glutenfree)
Icing:
  • 1 cup / 120 grams of powdered sugar 
  • 1/4 teaspoon of vanilla
  • 2 tablespoons of water or orange juice

Instructions:
  1. Beat butter, powdered sugar, brown sugar and salt in a large bowl with an electric mixer until the mixture is light and fluffy. Whisk flour blend, rice flour & xanthan gum in a medium bowl.  
  2. Add the flour mixture to the butter mixture, 0.5 a cup at a time, beating well  after each addition. Shape dough into a log, wrap tightly in plastic wrap  and refrigerate for at least one hour. 
  3. Preheat the oven to 300 degrees Fahrenheit or 180 degrees Centigrade.Cut the log into 1 cm or half an inch  thick slices and place on ungreased cookie sheets.  
  4. Bake about 25 minutes or until lightly browned. Cool for 10 minutes on cookie sheets then transfer to wire racks to cool completely.  
  5. Make the icing by adding the fluids and vanilla to the powdered sugar and stir well till all the powdered sugar is dissolved. Coat the cookies with the icing and decorate with the M&M's. Let the icing harden and then.. enjoy! 


ps. You can also decorate them with melted chocolate if you want a more adult version! But trust me, these are mouth watering too! (One is never to old for M&M's, right?)